Canon AE-1 Instruction Manual: A Comprehensive Guide
This guide details the Canon AE-1, a classic 35mm film camera, covering its features, operation, and maintenance. Explore user manuals, troubleshooting, and accessory information.
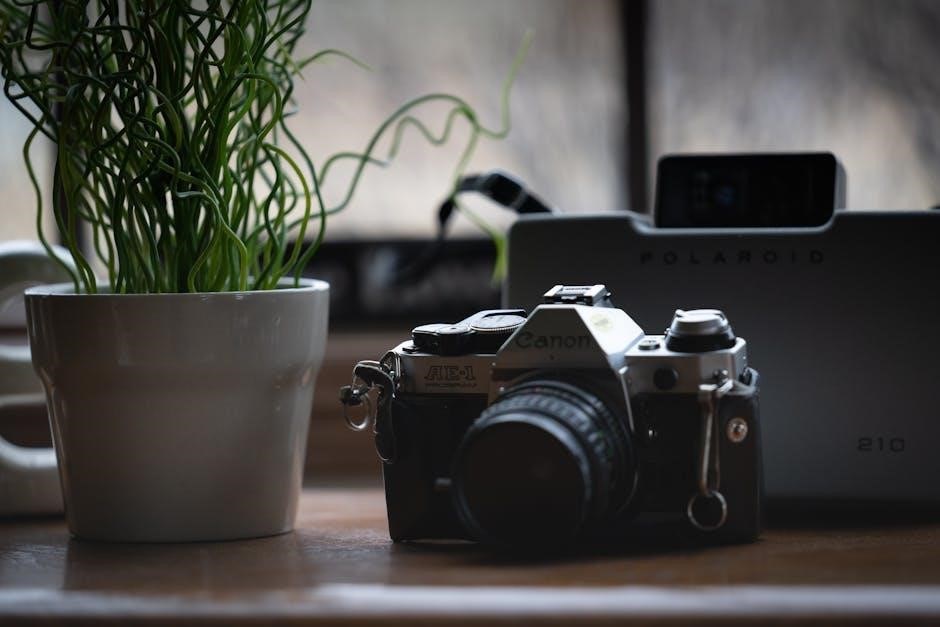
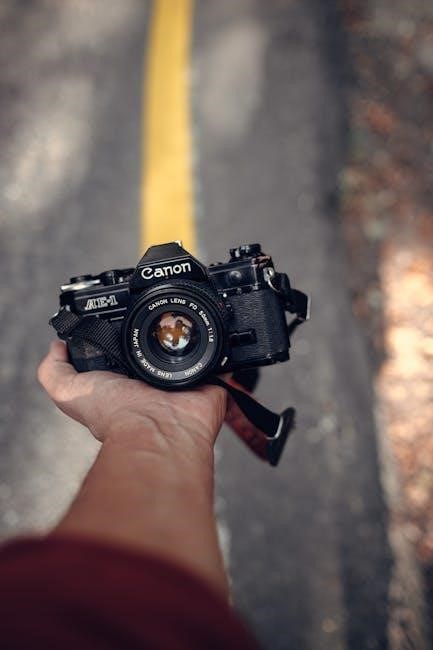
The Canon AE-1, released in 1976, revolutionized photography with its accessibility and advanced features. This 35mm SLR quickly became a favorite among enthusiasts and professionals alike. Its innovative aperture-priority autoexposure mode simplified exposure control, allowing photographers to focus on composition and creativity.
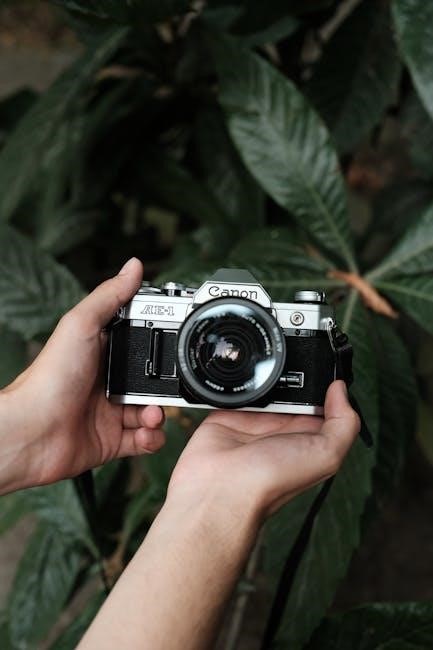
This camera’s enduring popularity stems from its robust build quality, extensive lens compatibility (Canon FD mount), and user-friendly design. Numerous resources, including detailed manuals, are available to help users master its capabilities. The AE-1 remains a compelling choice for those entering the world of film photography.
Understanding the Camera Body
The Canon AE-1’s body is primarily constructed from durable metal, ensuring longevity. Key components include the film chamber, viewfinder, top plate with controls, and baseplate housing the battery compartment. The camera’s ergonomic design provides a comfortable grip for stable shooting.
Essential features are logically arranged for intuitive operation. The top plate houses the shutter speed dial, exposure compensation dial, and film advance lever. Understanding the placement of these controls is crucial for efficient use. Its robust construction contributes to its reliability.
Key Components and Their Functions
The Canon AE-1’s viewfinder displays crucial shooting information, including shutter speed and exposure indicators. The shutter speed dial controls the duration of light exposure, ranging from 2 seconds to 1/1000th of a second. The aperture ring, located on the lens, adjusts the lens opening.

The film advance lever winds the film and cocks the shutter. The exposure compensation dial allows for adjustments to the meter’s reading. Finally, the self-timer enables delayed shutter release for self-portraits or group shots.
Locating the Controls
The Canon AE-1’s primary controls are intuitively positioned for ease of use. The shutter speed dial resides on the top deck, alongside the film advance lever. The exposure compensation dial is conveniently located near the viewfinder. Aperture control is managed via the lens aperture ring.
The film rewind crank and release button are found on the camera’s left side. The battery compartment is located on the bottom. Lastly, the self-timer button is situated near the shutter release, enabling convenient delayed shooting.
Loading Film into the Canon AE-1
Loading film into the Canon AE-1 is a straightforward process. First, open the camera back using the film rewind knob. Insert the film canister into the left side, ensuring it clicks into place. Thread the film leader across the camera and onto the take-up spool. Advance the film a couple of times, checking it catches properly.
Close the camera back and use the film advance lever to advance the film to frame one. The frame counter will automatically display the number of exposures remaining.
Film Type Compatibility
The Canon AE-1 is designed for use with 35mm film, offering versatility with various film types. It readily accepts black and white, color negative, and color slide (transparency) films. ISO sensitivity ranges from 25 to 3200, selectable via the film speed dial. Ensure the dial matches the film’s ISO for accurate exposure.
While modern films work well, older films may exhibit slight variations. Experimentation is encouraged to find films that suit your preferences and shooting conditions.
Proper Film Loading Procedure
Begin by opening the camera back using the film release lever. Insert the film canister into the left-side chamber, ensuring it seats correctly. Thread the film leader across the camera body to the take-up spool on the right. Advance the film using the film advance lever until the film is securely attached to the spool.
Close the camera back and gently advance the film a few times, observing the rewind knob to confirm it rotates. Reset the film counter to ‘S’ before shooting.
Setting the Exposure: Aperture and Shutter Speed
The Canon AE-1 offers both aperture-priority automatic exposure and full manual control. In aperture-priority mode, you select the f-stop, and the camera automatically sets the shutter speed for proper exposure. For manual control, adjust both aperture and shutter speed independently.
Understand that aperture controls depth of field, while shutter speed controls motion blur. Utilize the built-in light meter to guide your settings for accurate exposure.
Aperture Priority Mode Explained
Aperture priority on the Canon AE-1 lets you choose the f-stop, controlling depth of field – how much of the image is in focus. The camera then automatically selects the correct shutter speed for proper exposure, based on its metering system. This mode is ideal for controlling creative effects.
A wider aperture (lower f-number) creates shallow depth of field, blurring the background. A narrower aperture (higher f-number) increases depth of field, keeping more in focus.
Shutter Speed Control
The Canon AE-1 offers manual shutter speed control, allowing you to dictate how long the film is exposed to light. Shutter speeds range from 2 seconds to 1/1000th of a second, influencing motion blur and overall brightness. Faster speeds freeze action, while slower speeds create motion blur.
In shutter priority mode, you set the shutter speed, and the camera selects the appropriate aperture. Understanding this control is crucial for capturing sharp images in various lighting conditions.
Focusing Techniques with the Canon AE-1
Achieving sharp focus with the Canon AE-1 relies on mastering the viewfinder and understanding depth of field. Utilize the split-image rangefinder in the viewfinder; align the images for precise focus. Consider the aperture setting – smaller apertures (higher f-numbers) yield greater depth of field.
Practice focusing on subjects at varying distances. Remember that accurate focus is paramount for image quality, especially with prime lenses.
Using the Viewfinder for Accurate Focus
The Canon AE-1’s viewfinder features a crucial split-image rangefinder. Observe how the image is divided; rotate the focusing ring until the two halves align perfectly. This indicates sharp focus on your chosen subject. Additionally, the microprism collar surrounding the split-image assists with fine-tuning.
Pay attention to the focusing screen’s clarity. Practice regularly to develop muscle memory for quick and accurate focusing in various lighting conditions.
Depth of Field Considerations
Depth of field, the area appearing sharp, is controlled by aperture. Smaller apertures (higher f-numbers like f/16) yield greater depth, ideal for landscapes. Larger apertures (lower f-numbers like f/2.8) create shallow depth, isolating subjects with blurred backgrounds.
Consider your subject and desired effect. Experiment with different apertures to understand their impact. Focusing distance also influences depth of field; closer subjects have shallower depth.

Metering System and Exposure Compensation
The Canon AE-1 utilizes a center-weighted averaging metering system, prioritizing the center of the frame. It measures light to suggest optimal aperture and shutter speed settings. However, challenging lighting – strong backlighting or high contrast – can mislead the meter.
Exposure compensation allows manual adjustment. Positive compensation (+ values) brightens the image, while negative compensation (- values) darkens it. Use this to override the meter for accurate exposure.
Understanding the AE-1’s Metering Modes
The Canon AE-1 primarily operates in aperture-priority mode, where the user sets the aperture, and the camera automatically selects the shutter speed. The built-in light meter continuously assesses the scene’s brightness. A needle in the viewfinder indicates exposure, centered for correct exposure.
The meter responds to light reflected from the scene, favoring the center. Understanding this center-weighted approach is crucial for accurate metering, especially in high-contrast situations. Adjust exposure compensation when needed.
Using Exposure Compensation Effectively
Exposure compensation on the Canon AE-1 allows manual adjustment of the meter’s reading. Use it when the camera’s meter is fooled by unusually bright or dark scenes. The +/- dial adjusts the exposure, shifting the needle in the viewfinder. Positive values brighten the image, while negative values darken it.
For example, shooting snow requires positive compensation, while dark subjects need negative. Experimentation is key to mastering this feature and achieving desired results. Remember to return the dial to zero after use.
Using the Built-in Light Meter
The Canon AE-1 features a center-weighted averaging light meter, providing accurate exposure readings in various conditions. Half-press the shutter button to activate the meter, observing the needle in the viewfinder. The needle indicates whether the scene is underexposed, correctly exposed, or overexposed.
Adjust aperture and shutter speed until the needle centers on the “0” mark for proper exposure. Remember to consider the scene’s brightness and contrast for optimal results. Practice using the meter in different lighting scenarios.
Advanced Features of the Canon AE-1
The Canon AE-1 offers several advanced features for creative photography. Utilize the self-timer for self-portraits or delayed shots, activated by a lever near the shutter button. Explore multiple exposure capabilities by holding the multiple exposure release and rewinding the film after each shot.
These features expand your artistic possibilities. Experiment with different combinations to achieve unique effects. Remember to carefully consider the exposure settings for each shot when using these advanced functions.
The Self-Timer Function
The Canon AE-1’s self-timer allows for delayed shutter release, perfect for self-portraits or group photos where you need to be in the frame. Activate it using the lever located near the shutter button – move it to the ‘B’ or timer position.
The camera will then count down, indicated by the blinking red LED in the viewfinder, before automatically releasing the shutter. Experiment with the timing to achieve the desired result. Remember to compose your shot and be ready!
Multiple Exposure Capabilities
The Canon AE-1 offers the creative possibility of multiple exposures, layering two or more images onto a single frame of film. To achieve this, after taking your first shot, don’t advance the film. Instead, press the shutter release again to expose another image on the same frame.
Experiment with different combinations to create surreal or artistic effects. Be mindful of overall exposure; multiple exposures require careful consideration to avoid overexposure.
Troubleshooting Common Issues
Encountering problems with your Canon AE-1? Common issues include film advance difficulties – ensure the film is loaded correctly and the advance lever is fully engaged. Shutter release problems might stem from a low battery or mechanical obstruction; check both.
If the viewfinder is dark, verify proper battery installation. Persistent issues may require professional servicing to maintain optimal camera function.
Film Advance Problems
Difficulty advancing film in your Canon AE-1 often indicates improper loading. Ensure the film leader is correctly engaged with the take-up spool. A jammed film can occur if the spool isn’t rotating freely. Check for any obstructions or damage to the film path.
If the lever feels stiff, avoid forcing it; this could damage the mechanism. Confirm the rewind knob isn’t resisting, signaling potential film tension issues.
Shutter Release Issues
Problems with the Canon AE-1’s shutter release often stem from a discharged battery, preventing electronic operation. Verify the battery is fresh and correctly installed. A sticky shutter mechanism can also be the culprit; avoid excessive force.
If the shutter doesn’t fire, check the aperture priority mode setting. Ensure the lens is properly mounted and the camera isn’t in self-timer mode. Carefully inspect for any physical obstructions.
Lens Compatibility and Usage
The Canon AE-1 utilizes the Canon FD mount, accepting a wide range of FD and FD New lenses. These lenses offer varying focal lengths and apertures for diverse photographic needs. Adapters exist to use other lens types, but may limit functionality.
Ensure proper lens mounting by aligning the red dot on the lens with the corresponding mark on the camera body. Confirm secure attachment before operation. FD lenses provide full aperture control.
Canon FD Mount Lenses
Canon FD mount lenses were specifically designed for the Canon AE-1 and other Canon SLR cameras of that era. They are known for their optical quality and mechanical precision. FD lenses come in a variety of focal lengths, from wide-angle to telephoto, catering to diverse photographic styles.
New FD lenses offer improved coatings and performance. Proper care, including cleaning and storage, ensures longevity and optimal image quality. These lenses remain highly sought after by film photography enthusiasts.
Adapting Other Lens Types
While the Canon AE-1 natively uses FD mount lenses, adapters allow for using lenses from other systems. Adapters exist for M42, Olympus OM, and other mounts, expanding creative possibilities. However, using adapters may result in loss of certain functionalities, like aperture control.
Carefully research adapter compatibility and potential limitations before purchase. Ensure the adapter is well-made to avoid damaging the camera or lens. Manual focusing and aperture adjustments are often required with adapted lenses.
Battery Information and Replacement
The Canon AE-1 utilizes a 4LR44 or PX28 battery to power its light meter. These are relatively inexpensive and widely available. Battery life varies depending on usage, but expect several months with moderate use. When the battery is low, the light meter will become inaccurate.
To replace, open the battery compartment on the camera’s bottom. Ensure correct polarity when inserting the new battery. Avoid mixing old and new batteries, and always handle batteries responsibly.
Battery Type and Specifications
The Canon AE-1 requires a 4LR44 6V alkaline battery, or its equivalent PX28. These are button-cell type batteries specifically designed for camera light meters. Voltage must be 6V for accurate metering; lower voltage impacts performance. Typical capacity is around 1500mAh, though variations exist.
Ensure the battery matches these specifications for optimal operation. Using incorrect batteries can damage the camera’s circuitry. Always check the battery compartment for corrosion before installation.
Proper Battery Handling
Always insert the 4LR44/PX28 battery with the correct polarity, as indicated inside the battery compartment. Avoid mixing old and new batteries, or different battery types. Remove the battery if the camera will not be used for an extended period to prevent leakage.
Dispose of used batteries responsibly, following local regulations. Do not short-circuit, disassemble, or expose batteries to extreme heat or water. Corrosion can occur if batteries leak, damaging the camera.
Maintaining Your Canon AE-1
Regular cleaning is vital for longevity. Use a soft, dry cloth to wipe the camera body, avoiding harsh chemicals or solvents. Clean the film chamber with a blower to remove dust. For the lens, employ lens paper and cleaning solution specifically designed for optics.
Store the camera in a dry, dust-free environment. Periodically check the light seals for deterioration, replacing them if necessary. Avoid dropping or subjecting the camera to impacts.
Cleaning the Camera Body
To clean the Canon AE-1’s body, begin with a soft, dry microfiber cloth to remove loose dust and debris. For stubborn smudges, lightly dampen the cloth with distilled water – avoid excessive moisture. Never use solvents, alcohol, or abrasive cleaners, as these can damage the finish.
Pay attention to the textured grips, gently cleaning them to maintain a secure hold; Inspect the battery compartment for corrosion and clean if needed. Regular, gentle cleaning preserves the camera’s appearance.
Lens Care and Maintenance
Protecting your Canon FD lenses is crucial. Use a blower brush to remove dust before cleaning. For fingerprints or smudges, apply a lens cleaning solution to a microfiber cloth – never directly onto the lens.
Gently wipe in a circular motion. Inspect the lens elements for scratches or fungus. Store lenses with caps on, in a dry environment. Regular cleaning and careful storage ensure optimal image quality and longevity.
Understanding the Viewfinder Display
The AE-1’s viewfinder provides essential shooting information. You’ll see the shutter speed, indicated digitally, and a light-emitting diode (LED) system for exposure guidance. Plus/minus indicators show over or underexposure, aiding in exposure compensation.
A center dot signifies correct exposure. Focusing aids, like a split-image rangefinder, ensure sharp images. Familiarize yourself with these elements for precise control and optimal photographic results.
Using External Flash with the Canon AE-1
The Canon AE-1 supports external flash units for enhanced lighting control. Synchronization occurs at 1/60th of a second, the maximum flash sync speed. Connecting a flash is straightforward, utilizing the hot shoe on the camera’s top.
Ensure compatibility with the Canon FD mount system. Automatic flash modes are available with compatible units, simplifying exposure. Proper flash usage expands creative possibilities, especially in low-light conditions.
Flash Synchronization Speed
The Canon AE-1’s maximum flash synchronization speed is 1/60th of a second. Exceeding this speed will result in a portion of the image being black, as the shutter curtain closes before the flash fully illuminates the frame.
This limitation is due to the mechanical shutter design. Using slower shutter speeds allows full frame illumination; Understanding this speed is crucial for proper flash photography, ensuring balanced and correctly exposed images with external flash units.
Connecting External Flash Units
To connect an external flash to your Canon AE-1, locate the hot shoe on top of the camera body. Carefully slide the flash’s foot into the hot shoe, ensuring a secure connection. The hot shoe provides both mechanical support and electrical contact for triggering and communication.
Ensure the flash unit is compatible with the Canon AE-1’s system. Proper connection enables TTL (Through-The-Lens) metering for automatic flash exposure control.
Canon AE-1 Accessories
Numerous accessories enhance the Canon AE-1’s capabilities. Popular options include a variety of Canon FD mount lenses, offering diverse focal lengths and apertures. External flash units provide advanced lighting control, while a motor drive enables continuous shooting.

Other useful accessories encompass lens filters, light meters, and camera cases for protection. Explore these additions to tailor your AE-1 experience and unlock its full potential.
Resources for Further Learning
Expand your Canon AE-1 knowledge with readily available resources. Numerous online manuals and tutorials offer detailed guidance, covering everything from basic operation to advanced techniques. The official Canon support website provides valuable information, FAQs, and troubleshooting assistance.
Explore photography forums and communities to connect with fellow AE-1 users and share experiences. These platforms offer a wealth of knowledge and support for mastering your camera.
Online Manuals and Tutorials
Discover a vast collection of Canon AE-1 resources online. Digital copies of the original instruction manual are easily accessible, offering comprehensive guidance. YouTube hosts numerous video tutorials demonstrating camera operation, film loading, and focusing techniques.
Websites dedicated to film photography provide in-depth articles and guides. These resources cover everything from exposure settings to lens compatibility, enhancing your understanding and skills.
Canon Support Website
Although the Canon AE-1 is a vintage camera, Canon’s official support website may still offer limited resources. Explore the archive sections for potentially helpful documentation or FAQs related to older film cameras.
While direct AE-1 support is unlikely, the site provides general information about Canon lenses and accessories that might be relevant. Consider utilizing online forums and communities for more specific assistance and troubleshooting advice.
Dating Your Canon AE-1: Serial Number Guide
Determining your Canon AE-1’s production date is possible through its serial number. Typically, these numbers offer insight into when the camera was manufactured. Earlier models have lower serial numbers, while later ones have higher values.
Online resources and dedicated databases can decode the serial number, revealing the year and sometimes even the month of production. Knowing the date can be useful for collectors and understanding the camera’s history.
Canon AE-1 vs. Other Contemporary Cameras
Compared to rivals like the Nikon FM and Pentax K1000, the Canon AE-1 distinguished itself with its innovative shutter priority auto-exposure. While the Nikon FM offered full manual control, and the Pentax K1000 prioritized simplicity, the AE-1 blended automation with user control.
This made it appealing to both beginners and experienced photographers. Its electronic features were more advanced than many contemporaries, though some preferred the fully mechanical operation of other cameras.