Article Plan: Printable New Home Construction Checklist PDF (as of 12/12/2025)
Today’s date is 12/12/2025. This comprehensive guide offers a phase-by-phase checklist, available in PDF and Excel, to meticulously track your new home’s construction progress.
Phase 1: Pre-Construction & Planning (4 Headings)
Embarking on new home construction requires diligent pre-planning. This initial phase is crucial for a smooth build, starting with clearly defining the project’s scope – outlining exactly what you envision for your dream home. Next, establishing a realistic budget is paramount, accounting for all potential costs.
Securing your financial future involves securing financing and necessary permits before groundbreaking. A downloadable checklist ensures no detail is overlooked during these vital steps. Remember, thorough planning minimizes surprises and keeps your project on track, ultimately leading to a successful and satisfying home-building experience. Careful consideration now saves time and money later!
Initial Planning & Budgeting
Begin with a detailed scope and realistic budget. Secure financing and permits early; a printable checklist helps manage these crucial pre-construction steps effectively.
Defining Project Scope
Clearly outlining your project’s scope is paramount before breaking ground. A detailed checklist, downloadable in PDF format, assists in defining every aspect of your new home build. Consider size, style, features, and desired finishes – all crucial elements to document. This initial step prevents costly changes later.
Determine the number of bedrooms and bathrooms, kitchen layout preferences, and any special requirements like home offices or accessibility features. A well-defined scope ensures everyone involved – from architects to contractors – is aligned with your vision. Utilizing a printable checklist ensures no detail is overlooked during this critical planning phase, setting a solid foundation for a successful build.
Establishing a Realistic Budget
Creating a realistic budget is fundamental to a stress-free build. A printable new home construction checklist PDF should include a detailed cost breakdown. Account for materials, labor, permits, and potential unexpected expenses – a contingency fund is vital! Research average building costs in your area to establish a baseline.
Prioritize needs versus wants, as upgrades can quickly inflate the budget. Obtain multiple quotes from contractors and suppliers. Regularly track expenses against your budget using the checklist as a guide. A well-managed budget prevents financial strain and ensures you can complete your dream home without compromising quality or features.
Securing Financing & Permits
A printable new home construction checklist PDF must include a section for financing and permits. Begin by pre-qualifying for a construction loan; understand interest rates and loan terms. Simultaneously, research local building permit requirements – these vary significantly by location.
The checklist should detail required inspections at each stage. Submit permit applications well in advance, as approval times can be lengthy. Factor permit fees into your overall budget. Ensure all contractors are licensed and insured, providing proof as part of the documentation process. Proper financing and permits are crucial for a legal and smooth construction journey.

Site Preparation & Foundation (4 Headings)
A detailed checklist covers site surveys, soil testing, excavation, grading, foundation pouring, curing, and crucial foundation inspections for stability and compliance.
Site Survey & Soil Testing
Prior to any groundbreaking, a thorough site survey is paramount. This involves precisely mapping property lines, identifying easements, and noting existing utilities – crucial for avoiding future conflicts. Equally important is comprehensive soil testing; analyzing soil composition determines its load-bearing capacity and identifies potential issues like expansive clay or unstable ground.
The checklist ensures documentation of these reports. Proper soil analysis dictates foundation design, preventing costly structural problems down the line. Confirming adequate drainage is also vital, preventing water damage. Detailed records from these initial assessments form the bedrock of a successful build, ensuring long-term stability and adherence to building codes.
Excavation & Grading
Following site survey and soil testing, excavation and grading prepare the land for foundation work. This phase involves removing topsoil, digging to the required depth for the foundation, and ensuring proper slope for drainage away from the structure. The checklist emphasizes verifying excavation depths align with approved plans and soil reports.
Grading must establish positive drainage to prevent water accumulation around the foundation, safeguarding against potential damage. Compaction of the soil is critical for stability. Documentation of grading levels and compaction tests is essential, confirming adherence to local building codes and engineering specifications, ensuring a solid base for the upcoming foundation pour.
Foundation Pour & Curing
After successful excavation and grading, the foundation pour commences, forming the structural base of the home. The checklist details verifying the correct concrete mix, rebar placement according to plans, and proper formwork construction before pouring. Monitoring weather conditions during the pour is crucial to prevent issues like rapid drying or freezing.
Proper curing is paramount for concrete strength. This involves maintaining moisture levels for several days, often using coverings or spraying. The checklist includes documenting curing methods and duration, alongside monitoring for cracks or imperfections. A successful foundation pour and cure are vital for long-term structural integrity.
Foundation Inspection
Following the curing period, a thorough foundation inspection is essential before proceeding. The checklist emphasizes verifying dimensions against approved plans, checking for levelness and plumbness, and scrutinizing for any cracks, voids, or settlement issues. Inspecting the waterproofing membrane and drainage systems is also critical to prevent future moisture problems.
Documentation of the inspection findings is vital. This includes photographs of any discrepancies and a detailed report outlining corrective actions needed. Addressing foundation issues early prevents costly repairs later. A passed foundation inspection signifies a solid base for the entire structure, ensuring long-term stability and safety.
Phase 2: Framing & Enclosure (5 Headings)
This phase marks significant progress, transitioning from the foundation to the visible structure. The printable checklist details crucial steps like wall framing, ensuring proper stud spacing and secure connections. Roof framing and sheathing require verification for structural integrity and weather resistance.
Rough installation of windows and doors is also included. Prior to insulation, a framing inspection is paramount, confirming adherence to building codes and approved plans. This stage establishes the home’s shape and provides a protective enclosure, safeguarding against the elements and preparing for mechanical systems.

Framing Stage Checklist
Verify wall, roof framing, and sheathing are structurally sound. Ensure proper window and door rough-ins, and schedule a crucial framing inspection for code compliance.
Wall Framing & Sheathing
Carefully inspect all wall framing for proper alignment, plumbness, and secure connections. Verify that framing members meet specified size and grade requirements, adhering to building codes and approved plans.
Confirm appropriate nailing patterns and spacing for studs, headers, and plates, ensuring structural integrity. Check sheathing attachment, ensuring it’s securely fastened to the framing with correct fasteners and spacing.
Look for any gaps or voids in the sheathing and address them promptly. Ensure proper installation of bracing to resist lateral loads. Document all observations and any necessary corrections before proceeding to the next stage of construction.
Roof Framing & Sheathing
Thoroughly examine the roof framing for accurate pitch, proper rafter or truss spacing, and secure connections to the wall framing. Verify that all framing members meet specified size and grade requirements, complying with local building codes and approved architectural plans.
Inspect sheathing attachment, confirming it’s securely fastened to the roof framing with appropriate fasteners and correct spacing. Look for any gaps or voids in the sheathing and address them immediately.
Ensure adequate ventilation is incorporated into the roof structure. Document all observations and any required corrections before moving forward with the roofing process.
Window & Door Installation (Rough)
Verify that all window and door openings are properly sized to accommodate the units, ensuring a snug but not overly tight fit. Confirm that windows and doors are installed plumb, level, and square, utilizing temporary bracing to maintain their position during the process.
Inspect flashing installation around all window and door openings, guaranteeing a watertight seal to prevent water intrusion. Check for proper shimming to support the units and allow for operational adjustments.
Document any discrepancies or issues with installation, such as gaps or misalignment, for correction before proceeding to the next phase.
Framing Inspection
Schedule a framing inspection with the local building department before any insulation or drywall is installed. This critical step ensures compliance with building codes and structural integrity.
The inspector will verify proper nailing schedules, correct lumber sizes, and adequate support for all structural components, including walls, floors, and the roof. Ensure all required fire blocking is in place within wall cavities.
Address any deficiencies noted by the inspector promptly and obtain re-inspection approval before continuing construction. Document the inspection report for your records.

Rough-In Mechanicals (3 Headings)
Prior to insulation, complete plumbing, electrical, and HVAC rough-ins. Inspections are vital to confirm code compliance and proper system functionality.
Plumbing Rough-In
This stage involves installing all water supply and drain lines within the walls and floors before drywall is installed. Verify proper pipe sizing, slope for drainage, and secure mounting to prevent future issues.
Inspect all connections for leaks, ensuring compliance with local plumbing codes.
Key checklist items include: pressure testing of water lines, verifying trap locations, and confirming adequate support for fixtures.
Don’t forget to check for proper venting to prevent sewer gases from entering the home.
Document all inspections and approvals to avoid delays during the final stages of construction. A thorough plumbing rough-in is crucial for a functional and safe home.
Electrical Rough-In
During this phase, all wiring for outlets, switches, lighting fixtures, and the electrical panel are installed within the walls and ceilings. It’s vital to confirm wiring meets local electrical codes and is appropriately sized for intended use. Inspect all boxes for secure mounting and proper grounding.
Essential checklist points include: verifying the location of all outlets and switches aligns with the plans, ensuring sufficient circuit capacity, and checking for proper wire protection.
Document all work with photos and inspection reports. A correctly executed electrical rough-in is paramount for safety and functionality throughout the home.
HVAC Rough-In
The HVAC rough-in stage involves installing ductwork, vents, and the main HVAC unit’s infrastructure before insulation and drywall are applied. Confirm proper sizing of ductwork to ensure efficient airflow throughout the house, preventing hot or cold spots. Verify the unit’s location allows for easy access for future maintenance and repairs.
Key checklist items include: checking for proper sealing of duct connections to prevent air leaks, confirming adequate insulation around ductwork, and verifying compliance with local HVAC codes.
Thorough documentation with photos is crucial for future reference and warranty claims.
Phase 3: Interior & Finishing (6 Headings)
This phase transforms the framed structure into a livable home. It encompasses crucial steps like insulation, drywall installation, and applying interior finishes – flooring, painting, and trim. Cabinet and countertop installation follows, alongside fixture installations for plumbing, electrical systems, and the completed HVAC system.
A detailed checklist is vital to ensure quality and adherence to design plans. Confirm proper insulation levels for energy efficiency, smooth drywall finishes, and accurate fixture placement.
Regular inspections are key to address issues promptly and maintain project timelines.
Insulation & Drywall
Proper insulation and drywall are essential for energy efficiency and interior finishing. Ensure correct installation and smooth finishes for a quality build.
Insulation Installation
Verify proper insulation installation throughout the home, adhering to local building codes and energy efficiency standards. Inspect attic, wall, and floor cavities to confirm complete coverage without gaps or compressions.
Document the R-value of the installed insulation, ensuring it meets the project specifications. Check for vapor barriers installed correctly to prevent moisture buildup within the walls and ceilings.
Confirm that all wiring and plumbing penetrations are sealed to maintain thermal performance. A thorough inspection at this stage prevents future energy loss and potential mold growth, contributing to a comfortable and cost-effective living environment.
Drywall Installation & Finishing
Confirm drywall is hung correctly, securely fastened, and seams are properly taped and mudded. Inspect for level and smooth surfaces, free from visible defects like cracks or bulges. Ensure corners are reinforced with corner bead for durability and a clean finish.
Verify that all screw heads are properly dimpled and covered with joint compound. Check for adequate sanding between coats to achieve a seamless transition.
Prime the drywall to prepare it for painting, ensuring proper adhesion and a uniform finish. A quality drywall installation is crucial for aesthetics and provides a solid base for interior finishes.

Interior Finishes
Focus on flooring, painting, trim, cabinets, and countertops. This stage transforms the house, bringing your design vision to life with crucial aesthetic details;
Flooring Installation
Careful flooring installation is paramount for both aesthetics and longevity. Begin by verifying the subfloor is level, clean, and dry, addressing any imperfections before proceeding. Confirm the correct flooring material has been delivered and is free from damage.
Inspect underlayment installation, ensuring proper coverage and adherence to manufacturer specifications. During installation, check for consistent patterns, tight seams, and appropriate expansion gaps.
Document any discrepancies or concerns immediately. Post-installation, thoroughly inspect for squeaks, gaps, or uneven surfaces. Finally, confirm the chosen finish and protective measures are applied correctly, safeguarding your investment.
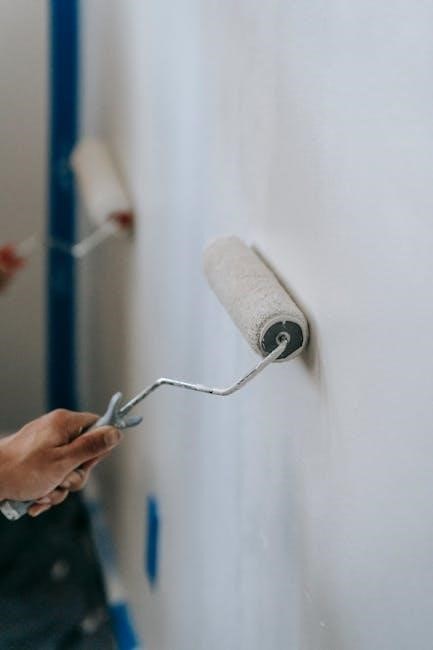
Painting & Trim
Proper painting and trim work elevate the finished look of your new home. Begin by ensuring all surfaces are clean, sanded, and primed for optimal adhesion. Verify the correct paint colors and sheen levels match approved selections. Inspect trim installation, confirming secure attachment and precise alignment.
Check for smooth paint application, free from drips, runs, or uneven coverage. Pay close attention to corners, edges, and areas where trim meets walls. Document any imperfections immediately for touch-ups.
Confirm protective coverings were used to shield flooring and other surfaces. A final walkthrough should verify a professional, flawless finish throughout the interior.
Cabinet & Countertop Installation
Careful cabinet and countertop installation is crucial for kitchen and bathroom functionality. Verify cabinets are level, plumb, and securely fastened to walls. Confirm correct cabinet styles, finishes, and hardware match approved plans. Inspect countertop seams for tight fits and consistent leveling.
Ensure countertops are properly supported and sealed to prevent water damage. Check for accurate cutout placement for sinks and appliances. Document any discrepancies in color, pattern, or installation quality.
A thorough inspection should confirm a professional, durable, and aesthetically pleasing result in these key areas.

Fixture Installation
Confirm proper installation of all plumbing, electrical, and HVAC fixtures. Verify functionality, secure mounting, and adherence to manufacturer specifications and building codes.
Plumbing Fixture Installation
Thoroughly inspect all installed plumbing fixtures, including sinks, toilets, showers, and bathtubs, for leaks and proper operation. Verify secure connections to water supply lines and drainpipes, ensuring compliance with local plumbing codes. Check faucet handles for smooth functionality and appropriate water temperature control.
Examine showerheads and tub spouts for consistent water pressure and spray patterns. Confirm toilet flushing mechanisms operate efficiently and without issues. Inspect under-sink plumbing for any visible damage or potential leak points. Document any discrepancies or required adjustments on the checklist for prompt resolution by the plumbing contractor. A detailed inspection ensures long-term reliability and prevents costly water damage.
Electrical Fixture Installation
Carefully examine all installed electrical fixtures – outlets, switches, lighting, and appliances – for secure mounting and proper functionality. Verify correct wiring connections according to electrical codes and manufacturer specifications. Test each outlet with a circuit tester to confirm proper grounding and voltage.
Inspect light fixtures for secure attachment and functioning bulbs. Ensure switches operate smoothly and control the intended lights. Check for any exposed wiring or potential electrical hazards. Document any issues, such as flickering lights or non-functional outlets, on the checklist for immediate attention from the electrician. A meticulous inspection guarantees safety and code compliance.
HVAC System Completion
Thoroughly inspect the completed HVAC system, including the furnace, air conditioner, ductwork, and thermostat, for proper installation and operation. Confirm the system is functioning efficiently, providing adequate heating and cooling throughout the home. Verify all vents are open and unobstructed, allowing for optimal airflow;
Check for any unusual noises or vibrations during operation. Ensure the thermostat is correctly programmed and responsive. Document any concerns, such as uneven temperatures or strange smells, on the checklist. A fully functional HVAC system is crucial for comfort and energy efficiency, demanding a detailed review.
Phase 4: Final Inspection & Completion (3 Headings)
This final phase centers on meticulous inspections and securing occupancy. Begin with a comprehensive final walkthrough, utilizing a detailed checklist to identify any remaining deficiencies – both exterior and interior. Address these promptly with the builder.
Schedule essential inspections with the building department to ensure code compliance. Successfully passing these inspections is vital for obtaining the Certificate of Occupancy, legally permitting you to inhabit the home. This document signifies the property meets all safety standards. A diligent approach guarantees a smooth transition into your new home.
Final Walkthrough Checklist
A thorough final walkthrough is crucial! Utilize a detailed checklist to meticulously inspect every aspect of your newly constructed home before finalizing the build.
Exterior Inspection
Carefully examine the exterior of your new home during the final walkthrough. Begin with the foundation, checking for any cracks or signs of settling. Inspect the siding, brickwork, or stucco for damage, inconsistencies, or improper installation. Verify that all windows and doors operate smoothly and seal correctly, preventing drafts.
Assess the roof for missing or damaged shingles, proper flashing around chimneys and vents, and ensure gutters and downspouts are securely attached and functioning effectively. Check landscaping, grading for proper drainage away from the foundation, and confirm walkways and driveways are level and safe. Don’t forget exterior lighting fixtures and any planned outdoor features!
Interior Inspection
A thorough interior inspection is crucial during your final walkthrough. Systematically check each room, starting with walls and ceilings for cracks, imperfections, or paint issues. Test all light switches, outlets, and fixtures to ensure proper functionality. Inspect flooring throughout the house for damage, gaps, or uneven surfaces.
Verify that doors and windows operate smoothly, locks function correctly, and trim is securely attached. Examine cabinets and countertops for damage or installation errors. Test all plumbing fixtures for leaks and proper drainage. Finally, confirm the HVAC system is operating efficiently and set to the desired temperature.
Final Inspections & Certificate of Occupancy
Secure a Certificate of Occupancy! This requires passing a building department inspection, confirming the home meets all safety and code requirements for habitation.
Building Department Inspection
The final building department inspection is a critical step towards obtaining your Certificate of Occupancy. Inspectors meticulously verify that all construction adheres to local building codes and approved plans.
This includes structural integrity, electrical systems, plumbing, HVAC, and safety features like smoke detectors and egress windows.
Prepare for scrutiny! Ensure all identified deficiencies from previous inspections are rectified. Have permits and documentation readily available. A successful inspection confirms your home is safe, habitable, and legally compliant, paving the way for you to finally move in and enjoy your newly constructed dream home. Don’t underestimate this crucial final hurdle!
Obtaining Certificate of Occupancy
Securing a Certificate of Occupancy (CO) is the ultimate goal! This official document signifies your new home meets all safety standards and is legally permitted for habitation. It’s issued after successful completion of all required building department inspections.
Don’t assume automatic approval. Follow up with the building department to confirm all paperwork is processed. A CO is essential for utilities activation and homeowner’s insurance. Without it, legally residing in your new home is prohibited. Celebrate this milestone – it represents the culmination of your construction journey and the beginning of a new chapter!