
Honeywell TH6210U2001 Installation Manual PDF: A Comprehensive Guide
Discover a detailed PDF guide for seamless TH6210U2001 setup, covering wiring, programming, and troubleshooting—essential for property managers and Honeywell Home users!
Understanding the Honeywell TH6210U2001 Thermostat
The Honeywell TH6210U2001, a T6 Pro Programmable Thermostat, represents a significant upgrade for home climate control; This thermostat isn’t just a temperature regulator; it’s a central hub for managing your heating and cooling systems efficiently. Understanding its capabilities is crucial for a successful installation and optimal performance.
Designed for ease of use, the TH6210U2001 offers programmable schedules, allowing you to customize temperatures based on your daily routines, potentially leading to energy savings. It supports various system types, including conventional heating and cooling, as well as heat pumps, utilizing wires like common (C), heat (W), cool (Y), fan (G), and the reversing valve (O/B) for heat pump configurations.
The official User Manual provides comprehensive instructions, ensuring even those unfamiliar with thermostat installation can navigate the process. Proper wiring is paramount, and the manual details how to correctly connect these wires to the base plate, avoiding potential connection errors caused by insufficient wire stripping. This thermostat is a key component in modernizing your home’s comfort and energy management.
Key Features and Specifications
The Honeywell TH6210U2001 boasts a range of features designed for convenience and efficiency. Key among these is its programmable functionality, allowing for customized temperature schedules to optimize comfort and reduce energy consumption. It supports up to 8 wires, accommodating diverse HVAC system configurations, including common (C), heat (W), cool (Y), fan (G), and reversing valve (O/B) for heat pumps.
This T6 Pro model offers a user-friendly interface for easy operation and programming. The thermostat’s specifications include compatibility with various heating and cooling systems, making it a versatile choice for many homes. The detailed User Manual outlines all features and provides step-by-step guidance.
Furthermore, the thermostat’s ability to integrate with smart home systems enhances its functionality. Understanding these specifications, detailed in the PDF manual, is vital for a successful installation and maximizing the thermostat’s potential benefits.
Thermostat Compatibility & Wiring Requirements
The Honeywell TH6210U2001 thermostat demonstrates broad compatibility, functioning with standard 24V heating and cooling systems. Crucially, it supports systems with or without a common (C) wire, though a C-wire is recommended for consistent power. Wiring requirements include connections for heat (W), cool (Y), fan (G), and for heat pump systems, the reversing valve (O/B).
Before installation, consult the PDF manual to verify compatibility with your specific HVAC setup. Incorrect wiring can lead to malfunctions, so careful attention to detail is essential. The manual provides clear wiring diagrams for various system configurations.
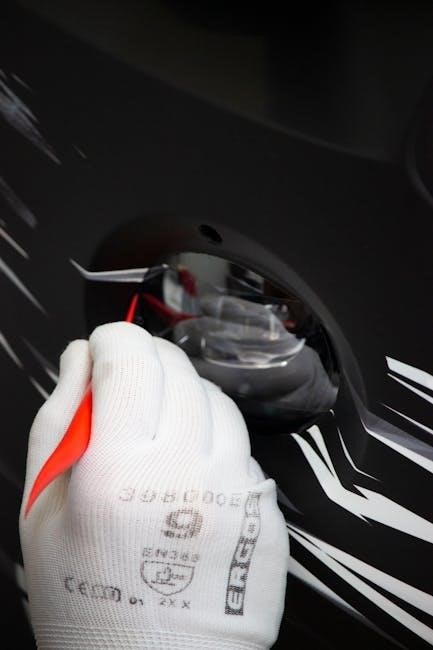
Missing wire stripping can cause connection errors, so proper preparation is vital. The TH6210U2001 supports up to 8 wires, ensuring flexibility for diverse installations. Always disconnect power before commencing any wiring work, prioritizing safety.

Installation Process: Step-by-Step
Follow the PDF manual’s clear instructions for safe wiring, identifying existing connections, and attaching the TH6210U2001 base plate—a streamlined process for professionals!
Safety Precautions Before Installation
Prioritize safety before commencing the TH6210U2001 installation. Always disconnect power to your HVAC system at the breaker box to avoid electrical shock. Confirm the power is off with a non-contact voltage tester. Incorrect wiring can damage the thermostat or your HVAC equipment, potentially creating a fire hazard.
Carefully read the entire PDF installation manual before beginning. Understand the wiring diagrams and identify all existing wires connected to your old thermostat. Ensure you have the correct tools, including screwdrivers, wire strippers, and potentially a level. If you are uncomfortable working with electrical wiring, consult a qualified HVAC technician.
Proper wire stripping is crucial; avoid nicking or damaging the wire insulation. Missing wire stripping can cause connection errors and system malfunctions. Take photographs of your existing wiring configuration before disconnecting anything – this serves as a valuable reference. Remember to label each wire clearly to prevent confusion during reconnection.
Identifying Existing Wiring
Before disconnecting wires from your old thermostat, carefully identify each one. Common wires include R (power), C (common – often blue, but not always), W (heat), Y (cool), G (fan), and O/B (reversing valve for heat pumps). Take clear, detailed photographs of the existing wiring configuration as a crucial reference point.
Use a wire labeling kit or masking tape and a pen to mark each wire immediately after identifying it. Note the terminal letter and wire color. The TH6210U2001 supports up to eight wires, so ensure you account for all connections.
If you find wires not connected to terminals, cap them individually to prevent accidental shorts. Consult the PDF manual’s wiring diagrams to confirm wire functions, especially for heat pump systems utilizing the O/B wire. Accurate identification is paramount for a successful installation and proper thermostat operation.
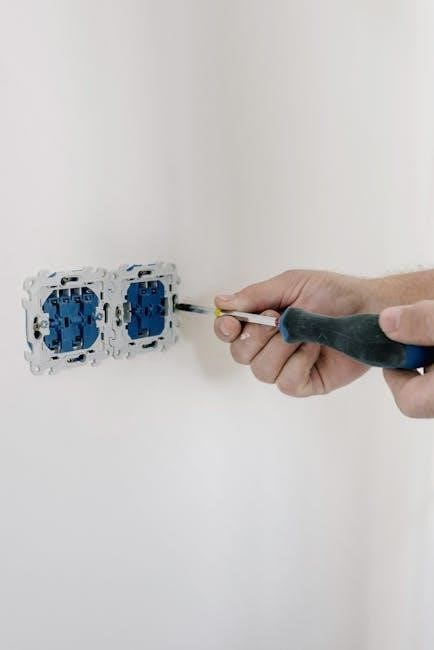
Connecting the Wires to the TH6210U2001 Base Plate
Using your previously labeled wires and the TH6210U2001 base plate terminal block, carefully insert each wire into the corresponding terminal. Ensure each wire is securely fastened; loose connections can cause operational issues. Double-check against your photographs and the PDF manual’s wiring diagrams to confirm accuracy.
Pay close attention to the O/B wire, as its configuration depends on your heat pump type. Missing wire stripping can lead to connection errors, so ensure adequate insulation is removed. Gently tug on each wire to verify it’s firmly held in place.
Avoid forcing wires into terminals. If a wire doesn’t easily insert, re-check the terminal letter and wire label. Proper connections are vital for the thermostat’s functionality and prevent potential electrical hazards.

Programming and Setup
Master your TH6210U2001 with the PDF manual’s guidance on initial setup, date/time configuration, and creating customized temperature schedules for optimal comfort and efficiency.
Initial Thermostat Setup & Powering On
Begin by carefully reviewing the Honeywell TH6210U2001’s PDF manual for crucial pre-power-on checks. Ensure all wiring connections are secure and match your existing system’s configuration, referencing the wiring diagrams provided within the manual. Once verified, proceed to restore power to the thermostat.
Upon powering on, the thermostat will initiate a self-test sequence. The display should illuminate, and you may observe a series of diagnostic checks. Allow this process to complete uninterrupted. The manual details what to expect during this phase and potential error indicators.
If the display doesn’t activate, double-check the power supply and wiring connections. The PDF guide offers troubleshooting steps for “no power” scenarios. Following the manual’s instructions precisely will ensure a smooth and successful initial setup, laying the foundation for optimal thermostat performance and control.
Setting the Date and Time
Accurate date and time settings are fundamental for proper scheduling with your Honeywell TH6210U2001 thermostat. Consult the PDF manual for the specific navigation steps, as these can vary slightly depending on the thermostat’s software version. Typically, you’ll access the settings menu using the thermostat’s control buttons.
Within the settings, locate the “Date” and “Time” options. Use the up and down arrows to adjust each value until it reflects the current date and time. Pay close attention to the AM/PM designation. The manual provides clear illustrations of the menu structure and button functions.
Confirm your selections by pressing the “Save” or “Done” button. Verify the accuracy of the displayed date and time. Correct settings are vital for the thermostat to execute programmed temperature schedules effectively, ensuring comfort and energy savings.
Creating and Scheduling Temperature Programs
Leverage the Honeywell TH6210U2001’s programmable features to optimize comfort and energy efficiency. The PDF manual details how to create customized temperature schedules tailored to your lifestyle. Access the programming mode through the thermostat’s menu, guided by the manual’s illustrations.
You can define different temperature settings for various periods – Wake, Leave, Return, and Sleep – each day of the week. Adjust the temperature for each period using the up and down arrows. The manual explains how to copy schedules to multiple days for convenience.
Consider your daily routines when setting temperatures. Lowering the temperature while away or asleep can significantly reduce energy consumption. The TH6210U2001 allows for flexible scheduling, maximizing savings and comfort. Review the manual for advanced programming options.
Advanced Features & Troubleshooting
Explore heat pump configurations (O/B wire) and resolve common issues like no power or incorrect readings—the PDF manual offers detailed TH6210U2001 guidance!
Using the Thermostat with Heat Pumps (O/B Wire)
Heat pump operation with the Honeywell TH6210U2001 requires careful attention to the O/B wire. This wire controls the reversing valve, switching between heating and cooling modes. The PDF manual details how to correctly configure this wire based on your specific heat pump system.
Some heat pumps utilize the O wire for cooling and the B wire for heating, while others operate conversely. Incorrect wiring can lead to the system running in the wrong mode or not functioning at all. The manual provides clear diagrams and instructions for identifying your system’s configuration.
Crucially, the TH6210U2001 allows you to select the appropriate O/B wire function within the thermostat’s settings. This ensures proper communication with the heat pump’s reversing valve. Refer to the PDF for step-by-step guidance on accessing and modifying these settings, guaranteeing optimal performance and efficiency.
Troubleshooting Common Issues (No Power, Incorrect Temperature)
The Honeywell TH6210U2001 PDF manual dedicates a section to resolving frequent problems. No power is often due to a disconnected C-wire or a tripped circuit breaker – the manual guides you through checking these. Incorrect temperature readings can stem from improper thermostat placement, drafts, or calibration issues.
The guide details how to verify wiring connections, ensuring each wire is securely fastened to the base plate. It also explains how to access the thermostat’s calibration settings to adjust the temperature display. For unresponsive displays, the manual suggests checking battery levels (if applicable) and power supply voltage.
Furthermore, the PDF provides a systematic approach to diagnosing issues, encouraging users to first rule out simple causes before attempting more complex troubleshooting steps. This ensures efficient problem-solving and minimizes potential damage.
Understanding Error Codes and Their Meanings
The Honeywell TH6210U2001 installation manual PDF includes a dedicated section deciphering error codes displayed on the thermostat. These codes are crucial for pinpointing specific system malfunctions, moving beyond general troubleshooting. The manual provides a comprehensive table listing each code, a clear explanation of the issue it indicates, and suggested corrective actions.
For example, a specific code might signal a faulty sensor, a wiring problem, or a communication error with connected HVAC components. The PDF emphasizes that ignoring error codes can lead to prolonged system inefficiencies or even damage.
Users are advised to record the error code before attempting any repairs and to consult the manual for detailed instructions. The guide also clarifies when professional HVAC assistance is necessary, ensuring safety and preventing further complications.
Resources and Support

Access the official TH6210U2001 PDF manual, Honeywell Home support, and FAQs for assistance—vital tools for property managers and users alike!
Downloading the Official TH6210U2001 PDF Manual
Obtaining the official Honeywell TH6210U2001 installation manual in PDF format is crucial for a successful and safe installation process. This comprehensive guide provides detailed diagrams, wiring schematics, and step-by-step instructions specifically tailored to the T6 Pro Programmable Thermostat.
You can typically find the PDF manual directly on the Honeywell Home support website. A quick search using the model number – TH6210U2001 – will lead you to the downloadable file. Ensure you are downloading from a trusted source to avoid potentially harmful software.
The manual covers everything from identifying existing wiring configurations to programming temperature schedules and troubleshooting common issues. It’s an invaluable resource for both experienced DIYers and those new to thermostat installation. Having the PDF readily available allows for easy reference during the installation and setup phases, ensuring a smooth and efficient experience. Always refer to the official documentation for accurate and up-to-date information.
Honeywell Home Support Website and Contact Information
For additional assistance beyond the TH6210U2001 PDF manual, Honeywell Home offers a robust support network. Their official website is a primary resource, providing FAQs, troubleshooting guides, and access to a knowledge base specifically addressing common thermostat issues. You’ll find detailed information regarding the T6 Pro Programmable Thermostat, including wiring diagrams and programming tips.
Direct contact with Honeywell Home support is also available. Typically, their website lists a phone number and potentially a live chat option for immediate assistance. These channels are ideal for resolving complex issues or clarifying specific installation steps.
Remember to have your thermostat model number – TH6210U2001 – readily available when contacting support, as this will expedite the assistance process. Utilizing these resources ensures you have the support needed for a successful installation and ongoing operation of your Honeywell thermostat.
Frequently Asked Questions (FAQ)
Q: Does the TH6210U2001 require a “C” wire? A: While often recommended, a “C” wire isn’t always mandatory, but it provides consistent power. The PDF manual details workarounds if a “C” wire isn’t present.
Q: Can I use this thermostat with a heat pump? A: Yes, the TH6210U2001 supports heat pumps, utilizing the O/B wire for reversing valve control. Refer to the manual for correct wiring configurations.
Q: What if my thermostat isn’t powering on? A: Check the breaker, ensure wires are securely connected, and verify the “C” wire (if used) is properly installed. Consult the troubleshooting section in the PDF.
Q: How do I reset the thermostat to factory settings? A: The manual outlines the specific steps for a factory reset, which can resolve certain programming issues. Honeywell Home support can also assist.