Ottlite Desk Lamp Manual: A Comprehensive Guide
Welcome! This manual provides detailed instructions for your Ottlite Desk Lamp‚ ensuring optimal performance and longevity. Explore features‚ setup‚ and troubleshooting for a superior lighting experience.
Discover how to maximize the benefits of Ottlite technology‚ from initial setup to bulb replacement‚ all within this comprehensive guide.

Ottlite Desk Lamps represent a significant advancement in task lighting‚ designed to enhance visual comfort and reduce eyestrain. Unlike traditional incandescent or fluorescent lamps‚ Ottlite utilizes specialized fluorescent and LED technology to mimic natural daylight. This unique approach delivers a cleaner‚ brighter light spectrum that more accurately renders colors‚ making tasks like reading‚ writing‚ crafting‚ and detailed work significantly easier and more enjoyable.
For decades‚ Ottlite Technologies has been a pioneer in healthy lighting solutions. Their commitment to innovation has resulted in a diverse range of desk lamps catering to various needs and preferences. From compact LED models ideal for small workspaces to larger‚ adjustable lamps perfect for extensive projects‚ Ottlite offers a solution for virtually any application.
This manual serves as a comprehensive guide to understanding and utilizing your Ottlite Desk Lamp effectively. We will cover everything from initial setup and operation to maintenance and troubleshooting‚ ensuring you get the most out of your investment. Whether you’re a student‚ professional‚ or hobbyist‚ an Ottlite Desk Lamp is designed to improve your visual experience and productivity.
Understanding the Benefits of Ottlite Technology
Ottlite Technology distinguishes itself through its commitment to replicating natural daylight. Traditional lighting often distorts colors and creates harsh shadows‚ leading to eye fatigue and reduced accuracy. Ottlite lamps‚ however‚ employ a specific fluorescent or LED spectrum that closely matches the sun’s natural light‚ resulting in superior color rendering and clarity.
This enhanced clarity translates to numerous benefits. Tasks requiring precise color matching‚ such as painting or crafting‚ become significantly easier. Reading is more comfortable‚ and detailed work demands less strain on your eyes. The balanced spectrum also minimizes glare and flickering‚ further reducing eye fatigue and headaches.
Furthermore‚ Ottlite lamps are designed with energy efficiency in mind. LED models‚ in particular‚ consume significantly less power than traditional incandescent bulbs‚ saving you money on your electricity bill. By investing in Ottlite‚ you’re not only improving your visual experience but also contributing to a more sustainable lifestyle. The technology promotes focus and reduces errors‚ boosting overall productivity.
Safety Precautions and Warnings

Important Safety Instructions: Before operating your Ottlite desk lamp‚ carefully read and understand all instructions. To reduce the risk of electric shock‚ never immerse the lamp‚ cord‚ or plug in water or other liquids. Always unplug the lamp before cleaning or replacing the bulb.
Warning: Do not use the lamp outdoors or in damp locations. Avoid looking directly into the lamp’s light source for extended periods‚ as this may cause eye strain. Ensure the lamp is placed on a stable‚ level surface to prevent tipping. Keep flammable materials away from the lamp during operation.
Caution: The lamp may become warm during use. Allow it to cool completely before handling or storing. Do not attempt to disassemble or repair the lamp yourself; contact qualified personnel for assistance. Use only the specified power adapter and bulb type. Failure to follow these precautions may result in injury or damage to the lamp.
Risk of Fire: Never cover the lamp.
Unboxing and Component Identification
Upon opening the package‚ carefully remove all components and verify their presence against the parts list. Your Ottlite desk lamp package should include: the lamp base (A)‚ the lamp head (B)‚ a power adapter (J)‚ and this user manual. Some models may include additional accessories like a USB charging port or specialized bulbs.
Inspect each component for any signs of damage incurred during shipping. If any parts are missing or damaged‚ do not attempt to assemble or operate the lamp. Contact customer support immediately for assistance. Familiarize yourself with the connector (K) on the lamp base‚ which is where the power adapter will be attached.
The lamp head may have adjustable features; identify the points of articulation for positioning. Retain the packaging for potential future transport or warranty claims. A quick visual check ensures you have everything needed for a smooth setup process. Refer to the diagram in this manual for a clear illustration of each component.
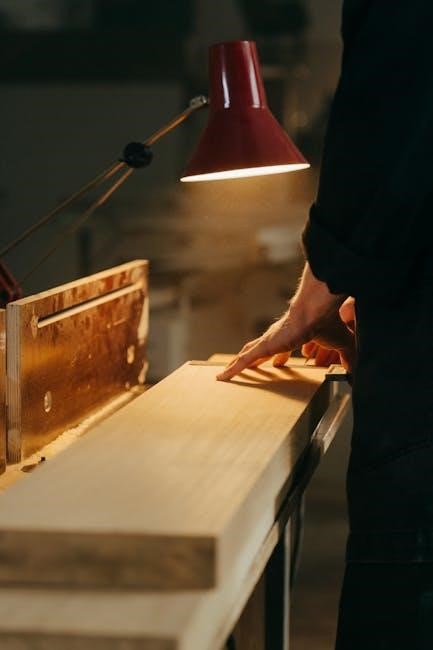
Lamp Base Assembly Instructions
Begin by placing the lamp base (A) on a stable‚ level surface. Ensure the surface is clear of obstructions and can adequately support the lamp’s weight. Most Ottlite desk lamps require minimal base assembly; however‚ some models may have a separate weighted base component. If present‚ align the base component with the designated slots or connectors on the underside of the main lamp base.
Gently press the weighted base into place until it clicks securely; Avoid excessive force‚ as this could damage the connectors. Verify the base is firmly attached and does not wobble. The base is designed to provide stability and prevent accidental tipping.
Before proceeding‚ double-check that all connections are secure. A stable base is crucial for safe and reliable operation. Once the base is assembled‚ you are ready to attach the lamp head. Refer to the diagram for visual guidance. Ensure the base is positioned in your desired location before attaching the head‚ as moving a fully assembled lamp can be cumbersome.
Attaching the Lamp Head
Carefully remove the lamp head from its packaging‚ taking care not to strain the connecting cord. Locate the connector port on the top of the lamp base – this is where the lamp head will attach. Align the connector on the lamp head with the port on the base. Gently insert the connector‚ ensuring it’s oriented correctly to avoid forcing it.
Once aligned‚ push the lamp head firmly into the port until you hear a click‚ indicating a secure connection. The head should rotate smoothly and hold its position without slipping. Do not attempt to force the connection if resistance is met; re-check the alignment.
After attachment‚ test the head’s range of motion. It should articulate smoothly through its intended angles. If the head feels loose or unstable‚ disconnect and re-attach‚ ensuring a proper click. A secure connection is vital for safe operation and optimal light positioning. Verify the cord isn’t pinched or strained during adjustment.
Powering the Lamp: Adapter and Connections
Your Ottlite Desk Lamp utilizes a power adapter for operation. Locate the adapter included in the packaging and inspect it for any damage. Identify the DC input jack on the lamp base – this is where the adapter connects. Ensure the voltage and amperage of the adapter match the specifications printed near the DC input jack. Incorrect voltage can damage the lamp!
Plug the adapter’s barrel connector firmly into the DC input jack. Then‚ plug the adapter’s AC plug into a standard wall outlet. Avoid using extension cords or power strips if possible; direct connection to a wall outlet is recommended. Verify the connection is secure at both ends.
Some models feature an on/off switch located on the power cord or base. Ensure this switch is in the ‘on’ position. If the lamp doesn’t illuminate‚ check the outlet and adapter connection. Never attempt to disassemble or repair the adapter yourself.
Initial Setup and Testing
After connecting the power adapter (refer to the previous section)‚ it’s time for initial setup and testing. Before switching on‚ ensure the lamp head is securely attached to the base and that all joints are firmly tightened‚ allowing for desired positioning. Place the lamp on a stable‚ level surface to prevent accidental tipping.
Now‚ power on the lamp using the power switch (if applicable) or by plugging in the adapter. Observe if the lamp illuminates. If it doesn’t‚ double-check the power connection and the outlet. Once illuminated‚ test the lamp’s functionality by adjusting the brightness levels and color temperature (instructions detailed in subsequent sections).
Verify the lamp’s flexibility by gently moving the lamp head and arm through their range of motion. Do not force any joints. This initial test confirms proper assembly and functionality before extended use. Note any issues immediately and consult the troubleshooting section.
Adjusting Brightness Levels
Your Ottlite desk lamp offers adjustable brightness levels to suit various tasks and preferences. Most models feature a touch-sensitive control panel or physical buttons for adjustment. Locate the brightness control – often indicated by a sun or lightbulb icon.
To increase brightness‚ typically tap or press the designated button/area. Repeat to cycle through available levels‚ often ranging from low‚ medium‚ to high. Conversely‚ decrease brightness by tapping or pressing the opposite control. Some lamps display brightness levels numerically or with a bar indicator.
Experiment with different settings to find the optimal illumination for reading‚ writing‚ crafting‚ or general use. Lower brightness levels are ideal for relaxed ambient lighting‚ while higher levels provide focused task lighting. Avoid prolonged exposure to maximum brightness. Remember to test the settings to ensure comfortable and effective illumination.
Color Temperature Control
Ottlite desk lamps with color temperature control allow you to customize the light’s appearance‚ ranging from warm to cool tones. This feature impacts focus and visual comfort. Locate the color temperature control‚ often symbolized by a snowflake (cool) or flame (warm) icon‚ or labeled with Kelvin (K) values.
Lower Kelvin values (2700K-3000K) produce warmer‚ yellower light‚ ideal for relaxing or creating a cozy atmosphere. Higher Kelvin values (5000K-6500K) emit cooler‚ bluer light‚ enhancing alertness and focus – perfect for detailed tasks. Adjust the color temperature by tapping or pressing the corresponding control.
Experiment to find the setting that best suits your activity and personal preference. Consider using warmer tones in the evening to minimize blue light exposure before bedtime. Some models offer preset color temperature options for convenience. Explore the different shades to optimize your workspace and visual experience.
Positioning and Flexibility of the Lamp
Ottlite desk lamps are designed with adjustable features to direct light precisely where you need it. Most models incorporate multiple pivot points‚ allowing for vertical and horizontal movement of the lamp head. Gently manipulate these joints to achieve the desired angle and illumination.
Ensure the lamp base is stable on a flat‚ secure surface before adjusting. Avoid forcing the joints beyond their natural range of motion to prevent damage. The flexible gooseneck design‚ common in many Ottlite lamps‚ enables precise positioning for tasks like reading‚ crafting‚ or computer work.
Proper positioning minimizes glare and shadows‚ reducing eye strain and enhancing visibility. Experiment with different angles to find the optimal setup for your workspace. Regularly check the stability of the lamp after adjustments to prevent accidental tipping. Utilize the lamp’s flexibility to create a comfortable and productive environment.
Replacing the Bulb
Always disconnect the lamp from the power source before attempting to replace the bulb. Allow the bulb to cool completely to avoid burns. Consult the Bulb Compatibility Guide (see section 12) to ensure you are using the correct replacement bulb for your specific Ottlite model.
Depending on the model‚ the bulb may be accessed by twisting‚ unscrewing‚ or gently pulling it from the lamp head. Refer to the specific model instructions for detailed guidance. Handle the new bulb with care‚ avoiding direct contact with the glass. Use a soft cloth or gloves to prevent oil transfer‚ which can shorten the bulb’s lifespan.
Carefully insert the new bulb into the socket‚ ensuring it is securely seated. Do not overtighten. Once the new bulb is installed‚ reconnect the lamp to the power source and test its functionality. Dispose of the old bulb responsibly‚ following local regulations for electronic waste.
Bulb Compatibility Guide
Using the correct bulb is crucial for optimal performance and to avoid damaging your Ottlite Desk Lamp. This guide outlines compatible bulb types for various models. Always check your lamp’s label or the original packaging for specific wattage and voltage requirements.
Most Ottlite lamps utilize specialized full-spectrum bulbs designed to mimic natural daylight. Common bulb types include fluorescent‚ LED‚ and halogen. LED bulbs are generally recommended for their energy efficiency and long lifespan. Wattage varies; some models require 9W‚ 13W‚ or 23W bulbs.
Incorrect bulb types can cause flickering‚ reduced brightness‚ or even lamp failure. Refer to the Ottlite website or contact customer support (see section 18) with your model number for precise compatibility information. Never exceed the maximum wattage specified for your lamp. Using a higher wattage bulb poses a fire hazard.
Troubleshooting Common Issues
Lamp doesn’t turn on: First‚ ensure the power adapter is securely connected to both the lamp and a functioning outlet. Check the outlet with another device. If still no power‚ inspect the adapter for damage. Flickering bulb: This often indicates an incompatible or failing bulb. Replace with a compatible Ottlite bulb (see section 12).
Dim or inconsistent light: Verify the bulb is properly seated in the socket. Adjust the brightness control (section 9). A dusty bulb can also reduce brightness; gently clean it with a soft cloth. Lamp feels hot: Ensure you’re using the correct wattage bulb. Overheating can indicate a problem; discontinue use and contact support.
Difficulty adjusting the lamp: Check for obstructions hindering movement. Ensure the joints are not overly tightened. If issues persist‚ consult the FAQ (section 19) or contact Ottlite customer support (section 17) for assistance. Do not attempt to disassemble the lamp for repair.
Cleaning and Maintenance
Regular cleaning ensures optimal performance and extends the lifespan of your Ottlite Desk Lamp. Always disconnect the lamp from the power source before cleaning. Use a soft‚ dry cloth to wipe down the lamp base‚ arm‚ and head. Avoid abrasive cleaners or solvents‚ as they can damage the finish.
Dust accumulation can reduce light output. Gently dust the bulb with a soft brush or cloth when cool. For stubborn marks‚ lightly dampen the cloth with water‚ then wipe and dry immediately. Avoid getting water inside the lamp housing.
Periodically inspect the power cord for damage. If damaged‚ discontinue use and contact customer support. Do not immerse the lamp in water. Proper care will maintain the lamp’s appearance and functionality for years. Avoid placing the lamp in excessively humid environments.
Extending the Lifespan of Your Lamp
Maximize your investment by following these guidelines to prolong your Ottlite Desk Lamp’s life. Avoid prolonged use at the highest brightness setting‚ as this can generate more heat. Opt for lower settings when appropriate to conserve energy and reduce strain on components.
Regularly check the power adapter and connections for wear and tear. Ensure proper ventilation around the lamp to prevent overheating. Avoid exposing the lamp to extreme temperatures or humidity.
When replacing the bulb‚ use only compatible bulbs (see Bulb Compatibility Guide). Handle bulbs carefully to avoid breakage. Proper maintenance and mindful usage will significantly extend the lamp’s operational life. Consider a surge protector to shield against power fluctuations. Consistent care ensures years of reliable illumination.
Ottlite Desk Lamp Features by Model
Ottlite offers a diverse range of desk lamps‚ each with unique features. LED Desk Lamps typically include adjustable color temperatures and brightness levels‚ often with touch-sensitive controls; Magnification Lamps combine illumination with a magnifying glass‚ ideal for detailed work.
Some models feature built-in USB charging ports for convenient device charging. Others boast flexible goosenecks for precise positioning. Certain lamps incorporate sanitizing technology‚ utilizing UV light to disinfect surfaces.
Explore specific features like dimming capabilities‚ multiple lighting modes (natural daylight‚ warm white‚ cool white)‚ and adjustable lamp heads. Refer to your model’s specific instructions for a complete list of features and how to utilize them effectively. Ottlite continually innovates‚ so features may vary between generations and product lines.
Specific Model Instructions (e.g.‚ LED Desk Lamp)
For your LED Desk Lamp‚ begin by removing all packaging materials. Connect the power adapter to the lamp’s input connector (K) and plug it into a standard outlet. To power on‚ use the touch-sensitive control panel located on the lamp head. A single tap typically activates the lamp at a default brightness setting.
Adjust brightness by sliding your finger along the brightness control bar. Color temperature can be altered by repeatedly pressing the color temperature button‚ cycling through options like daylight‚ warm white‚ and cool white. The flexible gooseneck allows for customized positioning; gently bend it to direct light where needed.
If the lamp doesn’t illuminate‚ ensure the adapter is securely connected and the outlet is functioning. For sanitizing models‚ follow the specific UV light operation instructions detailed in the accompanying safety guide. Always refer to the included diagrams for component identification.
Warranty Information and Registration
Ottlite Technologies proudly stands behind its products with a comprehensive warranty. Your desk lamp is covered against manufacturing defects in materials and workmanship for a period of one year from the original purchase date. This warranty does not cover damage resulting from misuse‚ abuse‚ accidents‚ or unauthorized modifications.
To activate your warranty and receive exclusive updates‚ register your product online at [insert website address here]. Registration requires your model number‚ serial number (located on the lamp base)‚ and proof of purchase. Keep your receipt as proof of purchase is required for all warranty claims.
For warranty service‚ contact Ottlite Customer Support (details in the next section). Do not attempt to repair the lamp yourself‚ as this will void the warranty. Ottlite’s warranty provides peace of mind‚ ensuring a quality lighting experience.
Customer Support and Contact Information

Need assistance? The Ottlite Customer Support team is dedicated to providing exceptional service. We are here to help with any questions‚ concerns‚ or troubleshooting needs you may have regarding your desk lamp. Our knowledgeable representatives can guide you through setup‚ operation‚ and warranty claims.

Contact us via:
- Phone: 1-800-842-4666 (Monday-Friday‚ 8:30 AM ⸺ 5:00 PM EST)
- Email: support@ottlite.com (responses within 24-48 hours)
- Website: www.ottlite.com (visit our comprehensive FAQ section and support resources)
- Mail: Ottlite Technologies‚ Inc.‚
1776 McGill Terrace‚
Tampa‚ FL 33605
For faster service‚ please have your model number and serial number readily available. Visit our website for helpful videos‚ downloadable manuals‚ and troubleshooting guides. We value your satisfaction and are committed to ensuring a positive experience with your Ottlite product.
Frequently Asked Questions (FAQ)
Q: My lamp isn’t turning on. What should I do?
A: Ensure the power adapter is securely connected to both the lamp and a working outlet. Check the outlet with another device. Verify the power switch is in the ‘on’ position.

Q: Can I use a different bulb than the one provided?
A: Refer to the ‘Bulb Compatibility Guide’ section for approved bulb types. Using incompatible bulbs may damage the lamp or void the warranty.
Q: How do I adjust the brightness?
A: Most models feature touch-sensitive controls or buttons; See ‘Adjusting Brightness Levels’ for specific instructions.
Q: My lamp is flickering. What could be the cause?

A: This could indicate a loose bulb or an incompatible bulb. Ensure the bulb is securely tightened and meets the specified requirements.
Q: Where can I find my lamp’s model number?
A: The model number is typically located on a sticker on the underside of the lamp base.
Ottlite Technologies Product Range
Ottlite Technologies extends beyond desk lamps‚ offering a comprehensive range of lighting solutions designed for enhanced visibility and well-being. Our product line includes Floor Lamps‚ providing full-room illumination with the same natural light quality as our desk lamps.
We also specialize in Magnification products‚ such as lighted magnifiers and lamps with magnification lenses‚ ideal for detailed work and hobbies. For convenient charging‚ explore our lamps equipped with integrated Device Charging ports.
Replacement Bulbs are readily available to ensure your Ottlite continues to perform optimally. Beyond lighting‚ Ottlite now offers sanitizing desk lamps featuring patented technology‚ promoting a healthier workspace.
Explore our shop by category: Desk Lamps‚ Floor Lamps‚ Magnification‚ and Accessories. Discover the perfect Ottlite solution to brighten your life and improve your visual experience. Visit our website for the complete catalog and detailed product specifications.